Setting up Ticket Embeds & Forms
1 | What are Ticket Embeds?
Ticket Embeds are panel embeds, the ability for users to click a button, or a form and a ticket is created. You can also have multiple-embeds allowing you to section and setup the bot to you desire.
Buttons will create a ticket without asking any questions, forms will create a ticket asking a pre-set defined (that you define on the panel) questions. For example "How can we help?"
Lets get you setup with using Ticket Embeds!
Once you have finished editing your perfect Ticket Embeds, please press "SEND EMBED"
2 | Multiple Embeds, Tags, Emojis, and Buttons
Helper.gg supports multiple embeds, allowing full customisation as well. An embed consists of tags (your reactions or buttons) which allow 100% customisation to channels, the message and so on.
Alongside tags you can also have a footer image to make it look extra fancy, ability to add an embed title, description and so on!
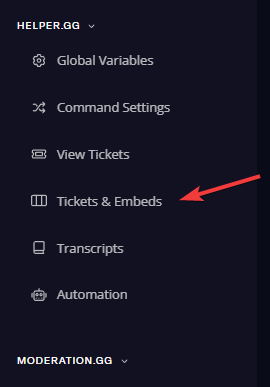
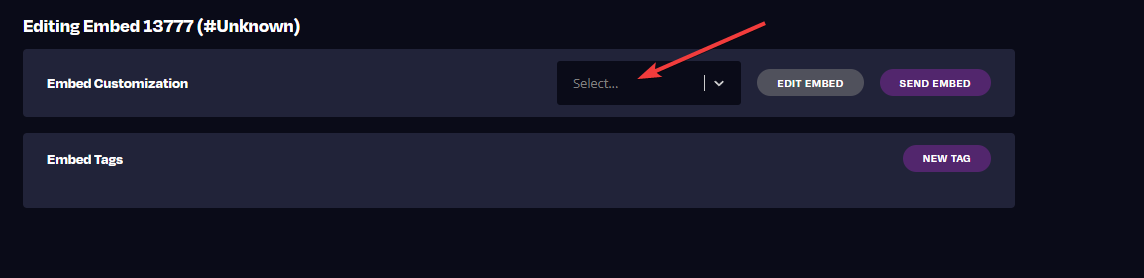
Firstly lets log into the panel at https://panel.parent.gg/, select your guild and go to "Ticket and Embeds"
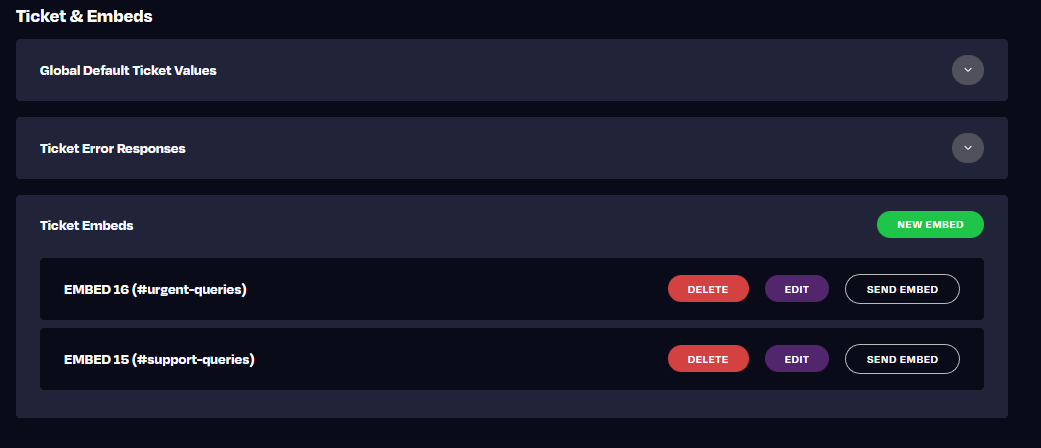
This will great you with; (Obviously, you won't have any embeds yet).
3 | Creating your first Embed
Here we will be creating your first embed to get you started with Helper.gg. We will be going through each step, one at a time.
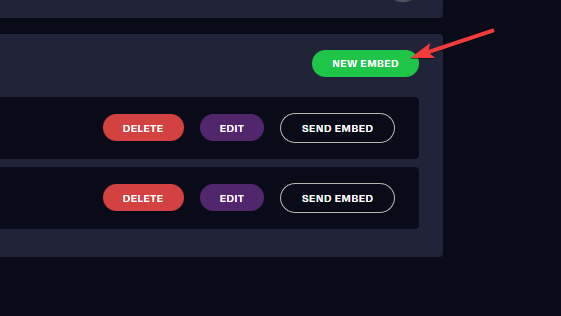
Please now create your first Embed like below;
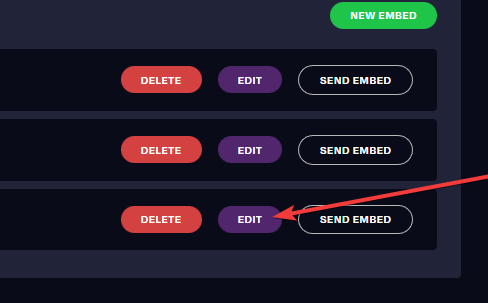
Now we have selected that, we need to click "EDIT" on the newly created embed.
4 | Setting the Panel Channel Location
You can now set where you want the Panel/Embed to be located within your guild, you will see the below box as per the below screenshot.
If you select that dropdown, now select the channel you want the Embed sent into.
Now we have set your embed location lets move onto the next step.
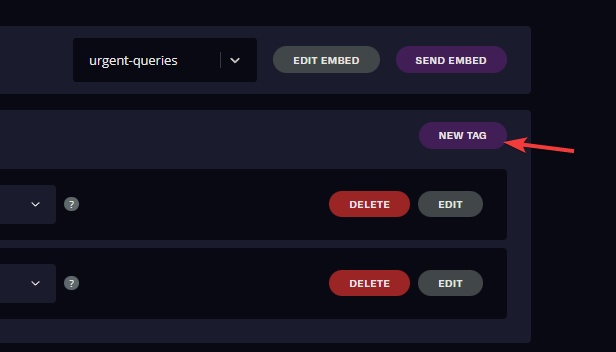
5 | Lets create your first Tag
So now we're onto a tag, as previously explained a tag is a button that triggers an action, whether that is a form which than creates a ticket or it straightaway creates a ticket. So to do so, on the same page click "New Tag"
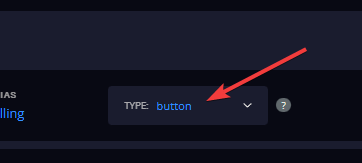
6 | Dropdowns or not?
Now at this point you need to decide if you want your buttons to form inside of a drop down, so say you created 5 buttons, and you don't want them to crowd an embed, you could put them into a drop down which displays them neatly. In this case we're going to leave it as a button, as we're only creating one tag here.
If you wish to set it as a dropdown select "Display:" and select Dropdown.
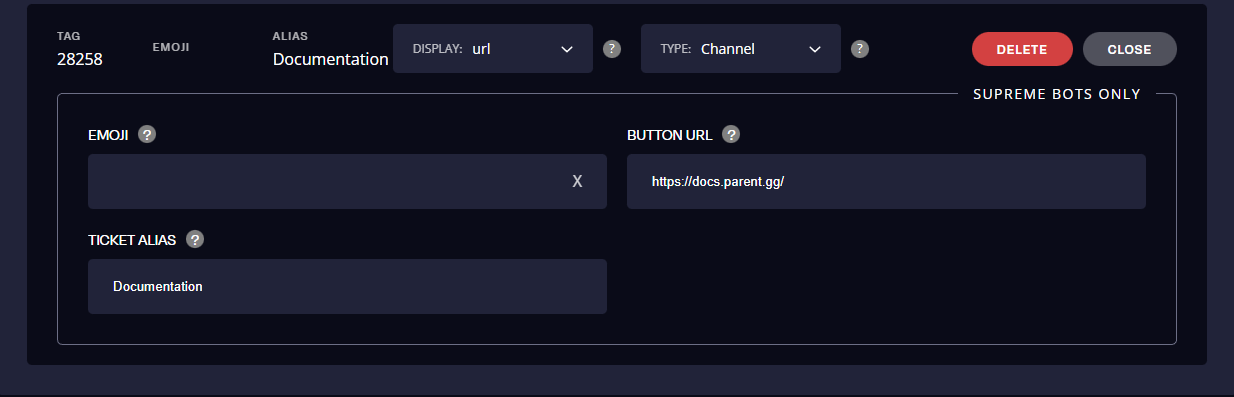
6b | External Link or not?
We have the ability for you to add an external URL Link - this allows users to click a button and be directly to your URL. This is a Supreme only feature sadly.
To do so click "Display: External Button", and put in the URL Button the URL, and in the Alias put what you want the button to be called.
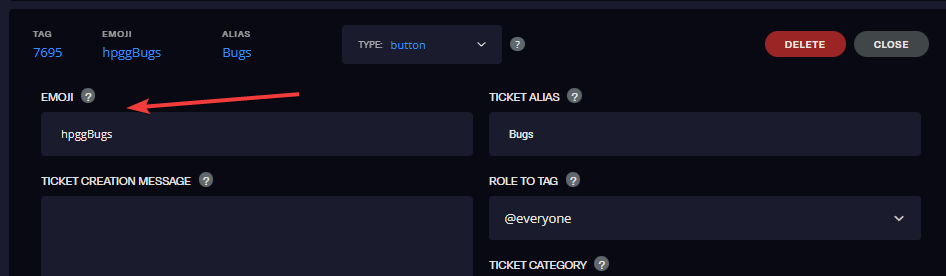
7 | Setting an Emoji for the button/form.
Prior to jumping into the decision of a button or a form, we need to give that tag an emoji, so it doesn't look super plain.
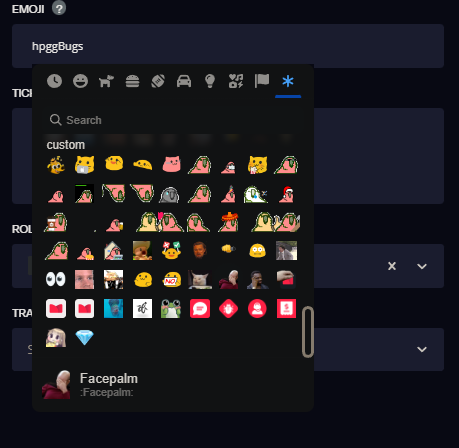
To do so click "Edit" on the tag, and find "EMOJI" as demostrated here.
When you clicked that you would find that you saw a bunch of emojis, using our emoji picker, you can find all the emojis that relate to your GUILD and to Discord. As below.
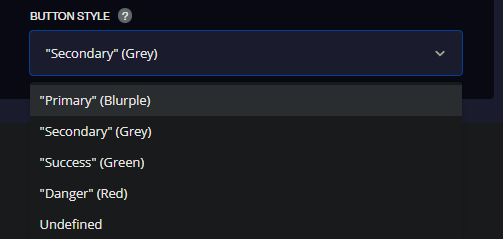
8 | Choosing a button style
So, at this point you have created your tag, added an emoji, now you need to select the colour of the button. To do so find "BUTTON STYLE" and select your desired colour.
9 | Deciding a Button or a Form Button
So, at this point you need to decide if you want your button/dropdown to prompt the user a form. A form is where you ask the user a set of questions, which are then printed into the ticket when submitted by the user. A button by default will instantly create a ticket on click. So adding a Form is a user intervention allowing you to ask your customers questions prior to the ticket being opened.
We will cover below both, if you wish to use only a button, and if you wish to use a form in a button.
10 | Creating a Button
Now that you have decided that you only want to use a button, you can skip to STEP 12.
Please scroll down till you find STEP 12.
11 | Using a Form
So this is where things get a little more fun, and more interesting. Don't worry, super simple. Unfortunately, I didn't want to fill this page up with everything, so we have made a new FORM Documentation for you to look at. Please look below.
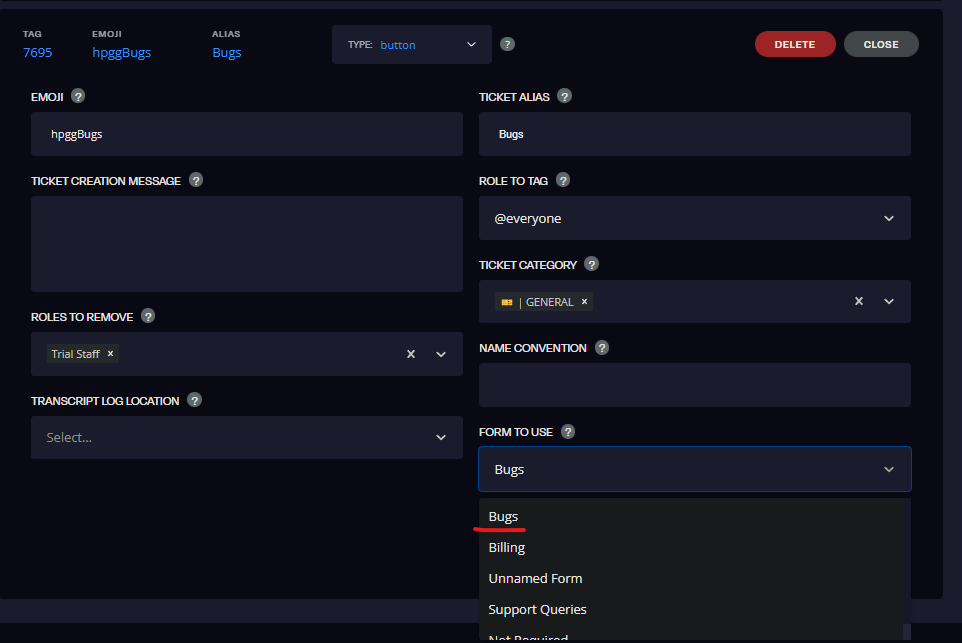
Now you have checked that documentation on how to create a form, and a series of questions, we need to tell the TAG to use that form. To do this, go back to the "Ticket Embed" page, and select Edit on your Embed, then select Edit on your Tag to get you back to the tag page you was on previously.
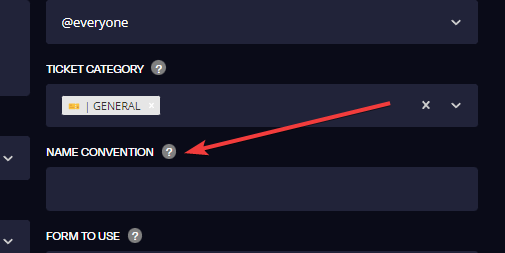
Once you're there, find "FORM TO USE" and select your form as described below.
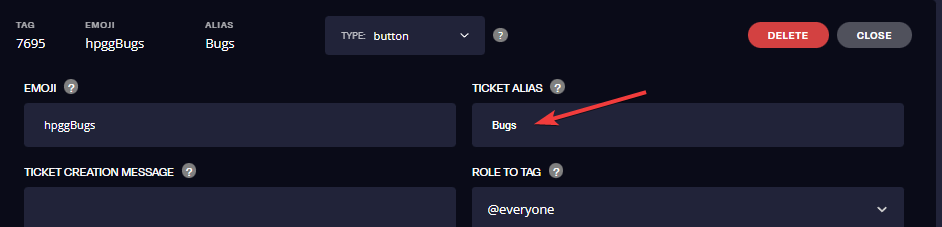
12 | Setting an Alias
The ticket tag alias that you will use to refer to the tag to, and the name of the Button. If you find the "TICKET ALIAS" and set that to your desired alias.
13 | Setting where the ticket gets created
Yes, that's right you can set the category where the ticket gets created per-tag and not as a whole, allowing you to make it so tickets can go into their own category.
We previously outlined how to set where the embed is created, we now need to set where the ticket is created.
If you find the option "TICKET CATEGORY" and click on the dropdown, select the category you want it created in.
Can you add (Setting multiple categories will allow for channel overflow if your server has many tickets)

Once done lets move onto who gets tagged on ticket creation.
14 | Choosing what roles are staff
Before we jump onto the Roles being Tagged, and Removed from Ticket Creation we first need to add them to the ticket. Please give the below documentation a read which explains how to use Discord Support Roles to leverage your Ticket Usage. By default you will have the "ticket-support" role, this role allows your team to run commands, and yourself. If you wish to amend, or change who can do what the below documentation is VERY important.

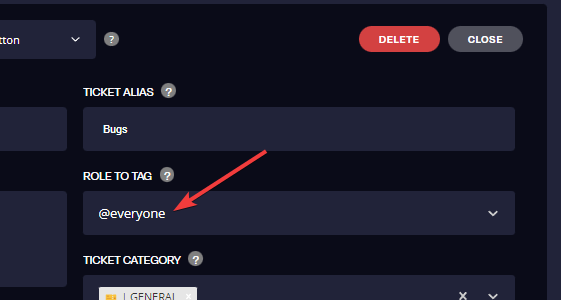
15 | Choosing what role gets tagged on ticket creation
This allows you to set who is tagged. By default the tag would listen to the global variable (which if unchanged would be @everyone). If you find "ROLE TO TAG" and select the role.
Once done we will move onto removing roles from tickets.
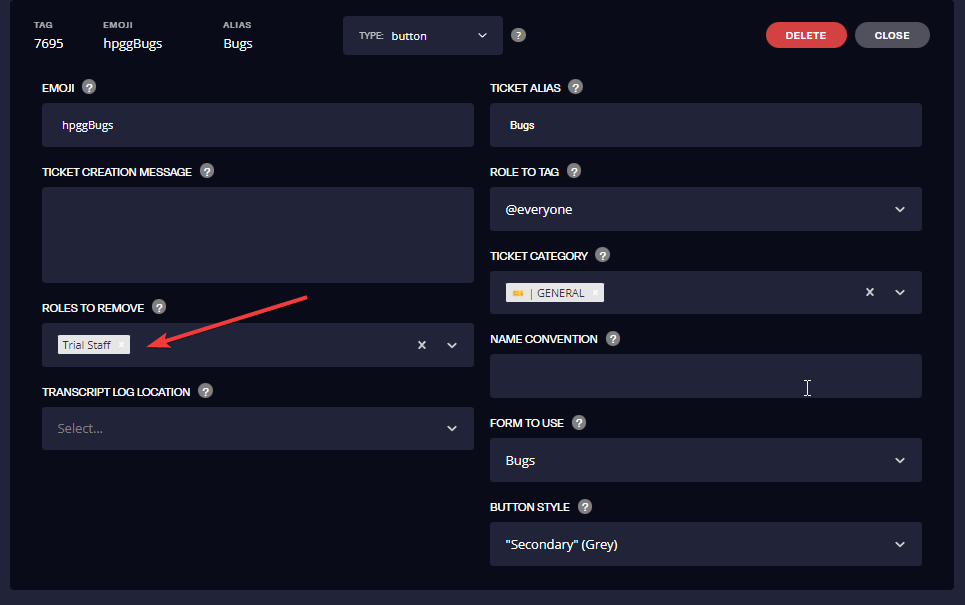
16 | Removing roles from tickets
So at this point you would've read the Discord Support Roles documentation, which explains how to add roles. Now, if you're a user who likes to have an "Administration Team" for example or a "Dev Team" and don't want every role you specified being added to a team, the below is important to you, if it doesn't impact you, then you can skip this step.
You can remove roles from tickets, lets say you have 10 staff roles, and you only want 5 of them, you can remove the other 5 you don't want using this functionality.
To do so find "STAFF ROLES TO REMOVE" and select the roles you want removed.
Now lets move onto setting the ticket embed creation message.
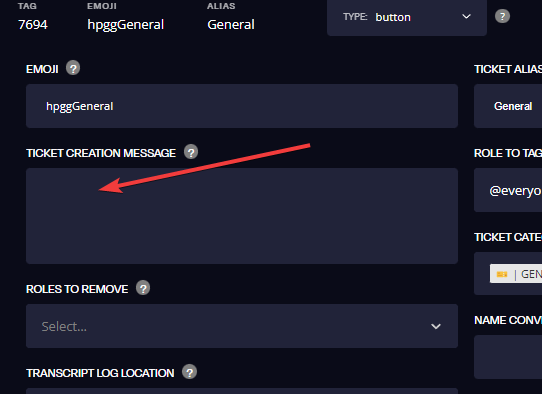
17 | Setting the ticket creation message
By default, a tag would use the standard message which is defined under the "Global Ticket Values" which is under "Tickets and Embeds" although this allows you to define what the tag sends on creation. Allowing you to have a different message dependant on the tag you are sending. To change this find "TICKET MESSAGE" and put in what you want.
This variable supports markdown, use it to your fullest.
If you want to add Emojis to your ticket message I'd recommend you gave the below documentation a read!
We are nearly done, lets move onto the last.
18 | Change channel name per ticket tag!
We have the ability to change channel names automatically 2 ways. The first having the ability to put the Creator Username in the channel name (e.g Dapper-1) and the second the ability to change the ticket name convention for each Ticket Tag, so for example if you have multiple emojis (or buttons), lets say they're called "Support" "Admin" "Billing" and "Reports" you can now name the tickets their counter-parts, so "support-1" "admin-1" "billing-1" "reports-1".
We also added the ability to put the username alongside the alias, so for example #support-dapper which is detailed in the below documentation.
To setup usernames in channels please follow the below guide:
https://docs.parent.gg/username-in-ticket-name/
To change the ticket tag name convention (please note if you have Creator Username in Ticket Name enabled this will override the Ticket Tag name convention) you need to find the option called "Name Convention" under the Ticket Tag you're looking at, it will look something like:
19 | Change log channel
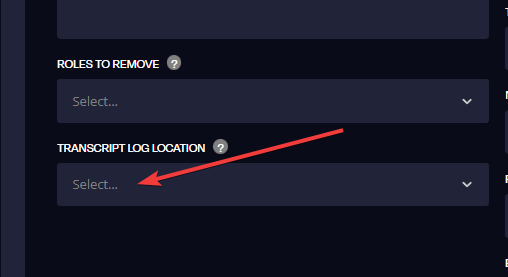
You can set the log channel that transcripts go into when the ticket is closed to be separate per Ticket-Tag, this allows you to ensure that selective type of tickets go into certain channels.
20 | Complete customisation of the panel message!
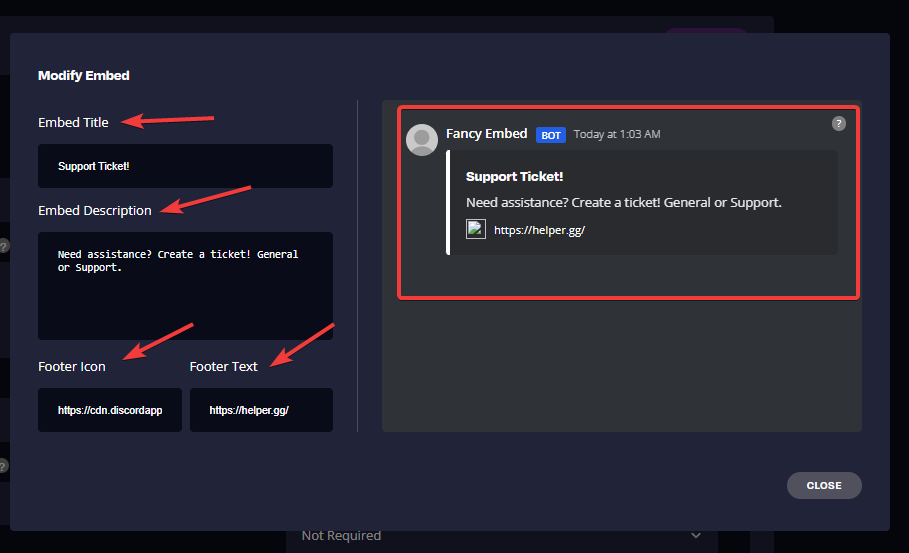
We allow 100% customisation of our bot! You can add an embed title, a embed icon, a description, footer image, and even footer text. (full-functionality of an embed that Discord give). To do so click "Edit EMBED" at the top of the page, where your embed is.

This displays the following, allowing you to change the Title, Description of the Embed, Icon, and Text. On the right hand side showing a fancy live update of your embed and how it looks.
and done!
Would you believe it, you're done creating your first embed. That's all folks. If you want to have more than one Embed, just click "New Embed" and scroll to the top!
Once you have finished editing your perfect Ticket Embeds, please press "SEND EMBED"
Thanks for using our services!